Adding beautiful chapter pages to your blog book
Add beautiful richness to the look of your book
Because our blog book editor offers so many ways to customize your blog book, it might happen that you overlook some of these supercool options. Luckily, you can find very helpful instructions in our article section.
In this article, you will learn how to easily add beautiful chapter pages to your blog book. Organize your content the way you want and give your project a real book feel:

Adding chapters just takes a few steps. Want to learn how? Keep on reading!
Adding chapter pages
Let’s start with a quick overview of the necessary steps. After that, we will show you more detailed information that is helpful!
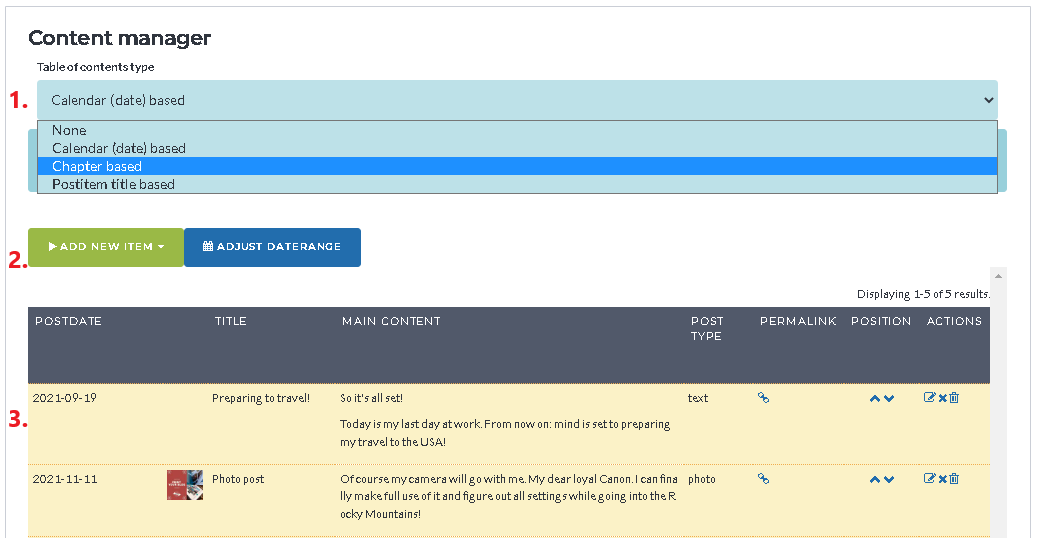
Okay, let's go! First of all, open up your book project editor and go to step 5 (Content manager)

- Step 1. Important. Set the Table of Contents type to ‘Chapter based’.
- Step 2. Click on ‘add new item’ button and create a chapter page in the appearing popup.
- Step 3. When created, drag & drop the chapter page to the position in the book item list where you want them to appear.
Simply repeat step 2. and 3. for every new chapter page you want to add to your book.
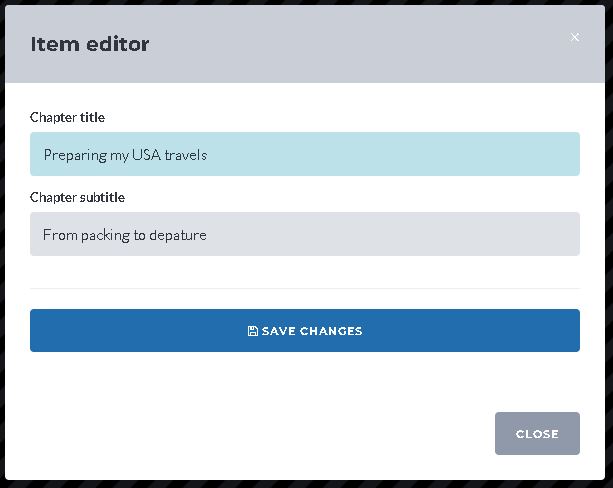
Chapter page item editor
If (step 2) you click on the green ‘add new item’ button, the following dropdown menu will appear. From it, simply choose ‘add chapter page’. After that, a popup will appear in which you can enter a chapter title and (optional) subtitle.


Drag & Drop new chapter item to right position
If you save the item, your book list will refresh and your new chapter page item will appear at the top of the list. Drag and drop it to the position that you want it to appear in your book and you are done!
If after this article you still have questions, you can always send us an email!