How to deal with white/empty gaps in your blog book?
Improve the look of your blog book pages
The conversion of a blog to book is a very new phenomena. Normally, creating the layout of a book and printing it takes a lot of manual work. Professional book designers are usually hired to get the process done. They work page by page and it takes many hours to perfect the layout and the structuring of the book pages.
Blog 2 Print services like us – Into Real Pages - offer an easy way to turn your blog into a book almost automatically, in just a few steps – and most of all: unlike hiring a professional designer, it is affordable!
The small tradeoff is that you sometimes will have to put a little bit of effort into getting the design and layout of your book right yourself.
Like all articles on our website, this article too is meant to guide you in customizing your book so that it is as perfect as possible.
While creating a book from your blog with Into Real Pages, you might notice that sometimes your book will show a lot of empty / unused space. See the screenshot below, for example:
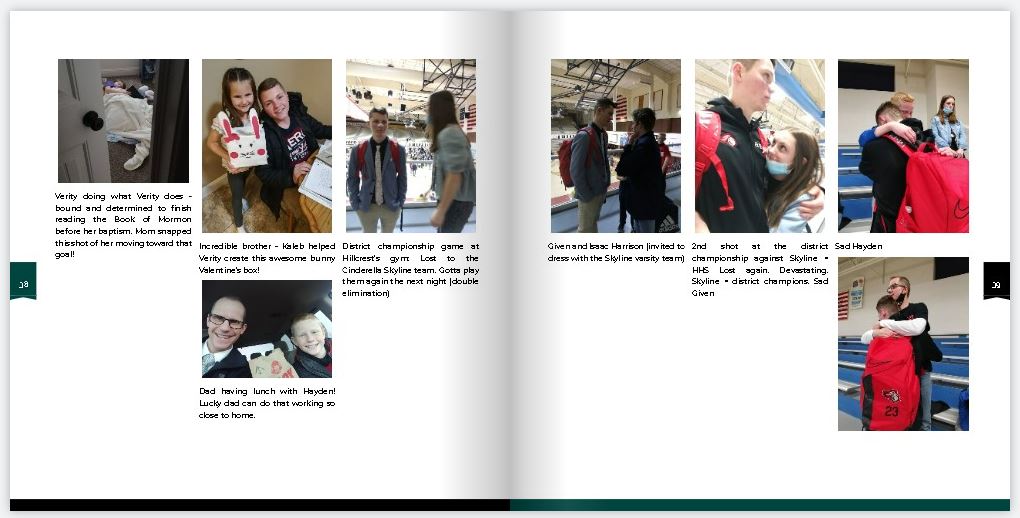
If so, here are a few tricks to reduce these white spaces.
Change the book format
Changing your book format could improve the overall way your book looks. The above screenshot concerns a square format book. Switching to a format sized book might suit your book more. Here is a screenshot of the same book as a portrait format:
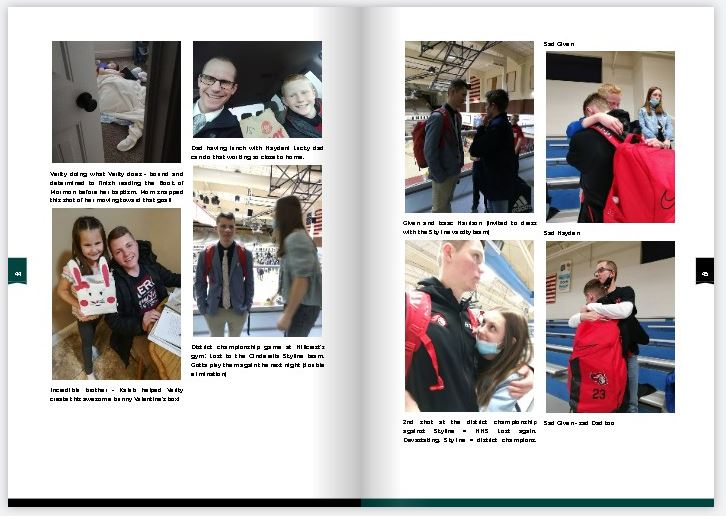
Looks better, right?
If the portrait format doesn’t work for you either, you can try to switch to the novel format. See what works for you.
Finetuning
Besides switching formats, you can try out two options in the extra settings in step 1 of your book project. The first one is called ‘hide postitem header’. It will hide the title ornaments of your postitem titles and by that save space. This usually results in less white gaps.
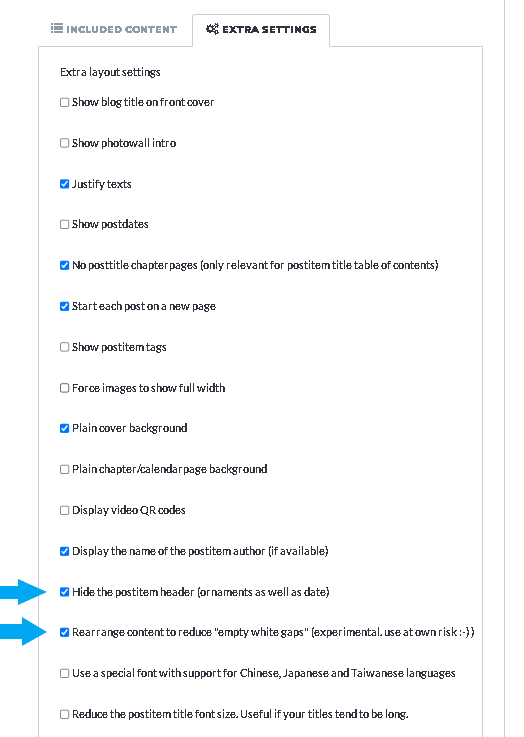
The second option is to enable the ‘rearrange content to improve white gaps’ option. This feature will move around the images of your postitems so that they will fill the pages of your blog book in a more ‘esthetic’ way.
Rewriting or rearranging your postitem content
The final option for improving the white gaps in your book would be to rewrite your post items. You can use the PostItem Manager (Step 5 of your book project) to edit the items in your book. Most of the time, white gaps appear when your postitems consist of mainly images and a little text. If you add more text between your images, your post items will flow more ‘fully’ onto the pages of your book. In other words: the pages of your book will be filled more with your content.
These are the three tips that we can give you.
If you still have questions or need help on your project, let us know by email!